Suricata can be used as both an Intrusion Detection System (IDS) and an Intrusion Prevention System (IPS). How it will be used is up to the individual or organization that deploys it on their network. Suricata can be placed in many places on a given network but often it will be deployed behind a firewall because it does deep packet inspection and will benefit from the reduction of traffic from the firewall. Suricata also comes with many prewritten rules that can be used, but it is generally necessary to include custom rules that are specific to the organization that will be using it.
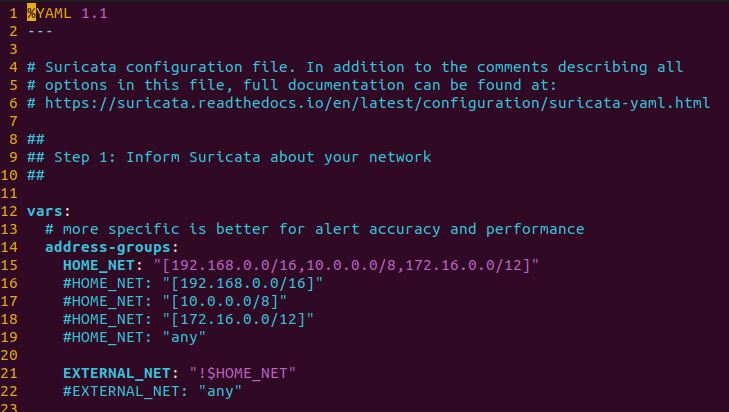
Custom rules can be created and added to Suricata by editing the configuration file which is also known as the YAML file. The YAML can be found in the directory /etc/suricata/suricata.yaml
The first setting to check is HOME_NET which should cover the IP for whatever device you’re trying to defend with Suricata.

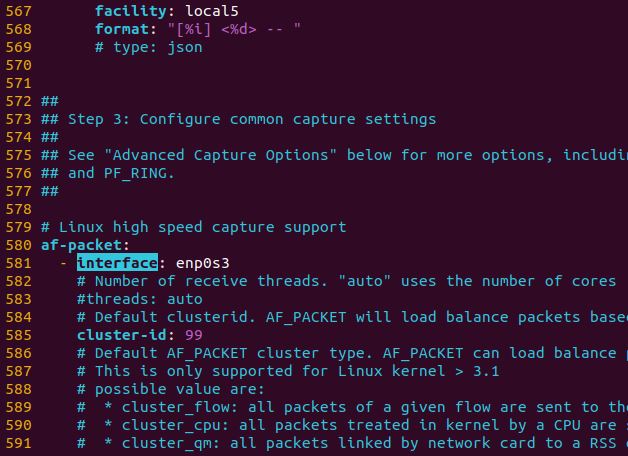
The next step is to change the default interface to the name of the interface on the device.

The default rule path needs to be edited as well to add the new file created with the custom rules.

With the path set the new custom rules file can be created in the following directory, local.rules will be its name.

The command vim local.rules will open the file and new rules can be created here.
A general overview of the Suricata structure is ‘Action’, ‘Protocol’, ‘Source and Destination’, ‘Ports’, ‘Direction’, and ‘Rule Options’.

In the above sample rule, the red portion is the ‘Action’. This is what tells Suricata what to do with the packet. In IDS mode you’ll see actions like ‘alert’ and ‘pass’ which will either generate an alert in the event log or stop any further inspection of the packet. In IPS mode you’ll see actions such as ‘drop’ and ‘reject’ which will drop the packet and sometimes send an error packet depending on specific action.
The green portion contains the protocol, source and destination, ports, and direction. The protocol will differentiate what type of traffic it is, such as tcp, udp, and icmp. Application layer protocols can also be used, like http, tls, dns, and many others. Next in the order is the source of the traffic, which will be denoted by the IP in most cases. Following that is the source port, or ‘any’ for all ports. The arrow (->) denotes the direction of the traffic, from source to destination, but can also be bidirectional. The remaining portions are the destination IP and destination port, which works the same as the source.
Finally, the blue portion contains the ‘Rule Options’. These will contain additional information on each rule and will also allow for very specific filtering of packets. the message option (msg:) will give a brief description of the rule. The content option (content:) will check the payload for an exact match of whatever is written between the quotations. There are many additional keywords that can be used when writing new custom rules.
I created a couple of basic rules to test them out and see if Suricata would catch the traffic and issue the alerts.
alert icmp any any -> any any (msg: "ICMP packet detected"; sid: 1000004;)This rule is set up to detect ICMP traffic from any source to any destination. So it will detect it in any direction, to or from this virtual machine.
Suricata needs to be restarted for the new rules to be active. Use the following command to do that.
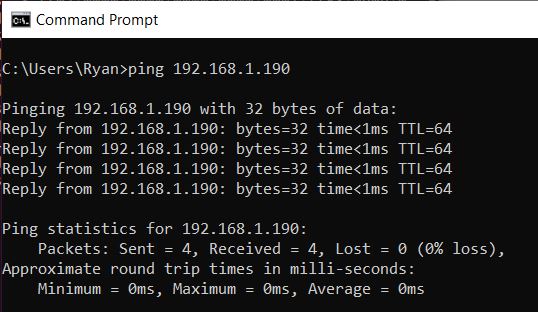
systemctl restart suricataTo check this first rule I ran a ping command to ping the virtual machine from a different computer. This will send the ICMP packets which should be picked up by Suricata.

To check if the alerts were triggered I ran the command tail /var/log/suricata/fast.log which will pull the last ten lines in the log file. As you can see the rule successfully triggered the alert for the ICMP traffic from the pings.

The next rule was set up to catch any TCP traffic going from the home network to port 443 (HTTPS) for any IP.
alert tcp $HOME_NET any -> any 443 (msg:"***TEST 123***"; sid:1000006;)I visited some websites to generate some traffic and then ran the same command again to check the log file.

This one was successful as well.
Rules for Suricata can be very broad like these simple examples or very specific to target single IP’s and even specific malware and much more. The logs generated can also be fed into a SIEM tool for further analysis.