
The simple definition of Vulnerability Management is that it’s the process of continuously identifying, evaluating, treating, and reporting vulnerabilities. This is an important and necessary process for our modern day businesses because so much of what we do is technology based and that pretty much requires us to be connected to the internet. This requirement introduces risk because there will always be bad actors trying to penetrate our networks seeking sensitive information, money, access, and many other things.
It is virtually impossible to create a 100% secure network but it is possible to minimize this risk. Proper vulnerability management can help with this by running scans on individual computers or large portions of a network at once. The scans will identify what risks are present and offer solutions to remediate those risks. The risks can range from deprecated software to ports that should not be open among a multitude of others. Fortunately the cybersecurity company Tenable offers a vulnerability scanner named Nessus that assists with the vulnerability management process.
In this exercise I’ll cover how to run a vulnerability scan using Nessus on a virtual machine that will be setup specifically to contain several vulnerabilities. Then some remediation solutions that Nessus offers will be implemented to see the difference before and after vulnerability scan.
The first step is to download Windows 10 so that it can be installed on the Virtual Machine. Fortunately Microsoft makes this simple and offers a download on their webiste.
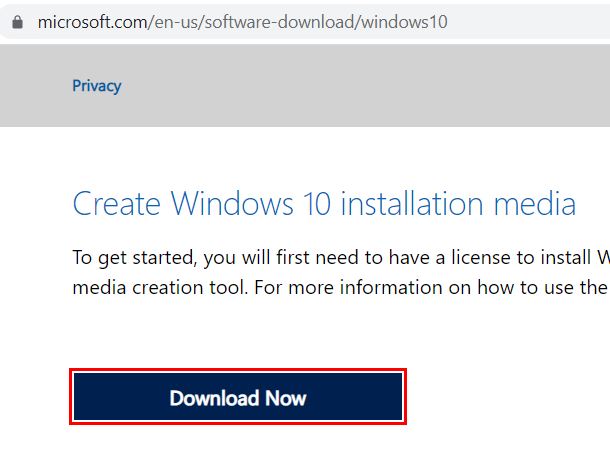
After the file downloads it can be opened and it will go through the installation process using the option to install as an ISO file.
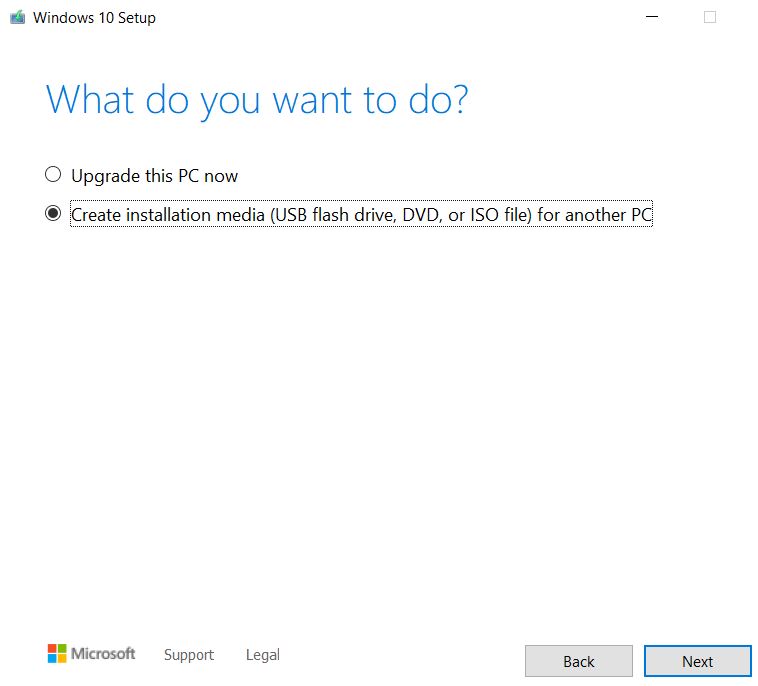
After saving it to the desired directory it will begin to download Windows 10. When the download finishes the virtual machine can then be installed, and in this example VMware will be used to create it.
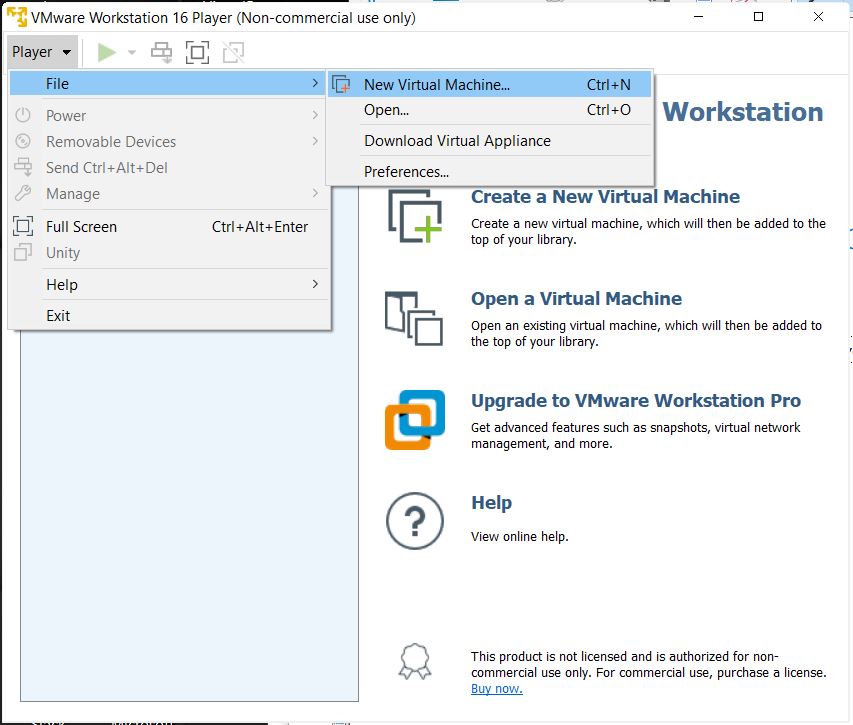
To get the process started Player -> File -> New Virtual Machine is selected and then the Windows 10 ISO file is chosen as the operating system to be installed.
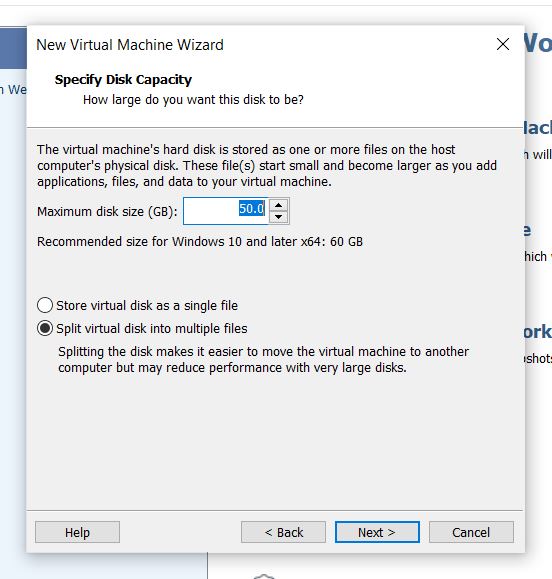
Then a new name can be chosen for the virtual machine, and to what directory it will be installed. When prompted to specify the disk capacity I chose a maximum disk size of 50 GB which is more than enough for the purpose of this exercise.
I went ahead and chose ‘Customize Hardware’ to increase the amount of RAM and number of processor cores to be used for the virtual machine. The default amounts should be plenty, but it doesn’t hurt to give it a bit more memory and processing power. It’s good to keep in mind the source of the memory and processor cores when doing this. If running it on a personal computer or laptop it will ‘borrow’ the RAM and processor to be used on the virtual machine. If running it in the cloud, the extra processing and storage can have increased cost. The Network Adapter was also changed to Bridged so that the virtual machine will receive its own IP address and be discoverable on the DHCP enabled network.
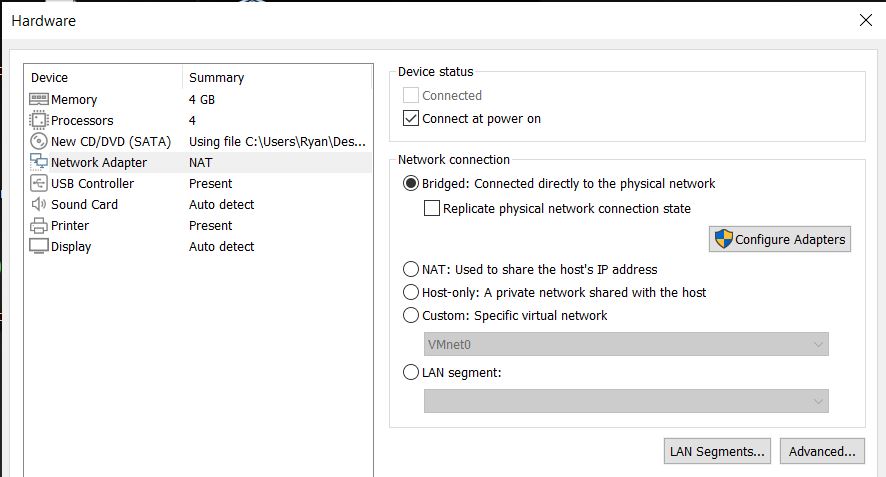
Now the virtual machine is ready to be created and it will start to boot up once the configuration is finished. The next bit is just going through the initialization process to get Windows installed on the virtual machine, and in this case Windows 10 Pro is being used. When given the option, a Custom Install was chosen and then it takes a bit of time to go through the installation process. The next several steps are general options for the user, and then finally it’s time to continue with the limited setup option. For simplicity in this exercise I used ‘admin’ for the username and finished off the remaining credentials and chose ‘no’ for all the privacy settings. That finishes off the initial setup and it will load to the Windows desktop after a few minutes.
Now it’s time to get the virtual machine’s IP address by going to the command prompt and entering the command ‘ipconfig’. With the IP address the virtual machine will be able to be pinged from the host machine to make sure everything was set up correctly.
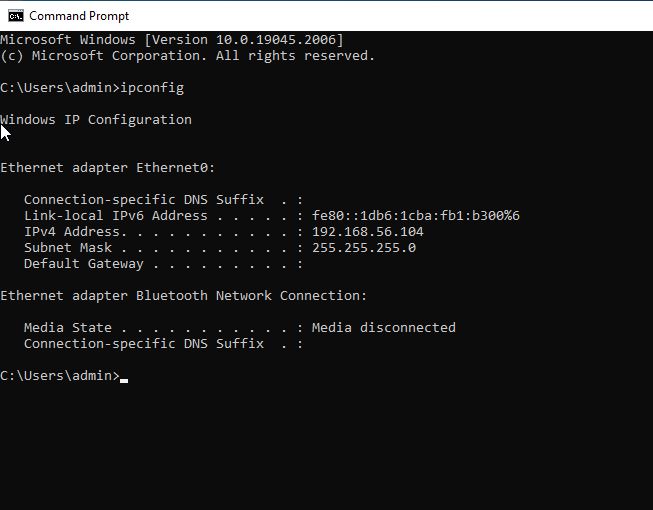
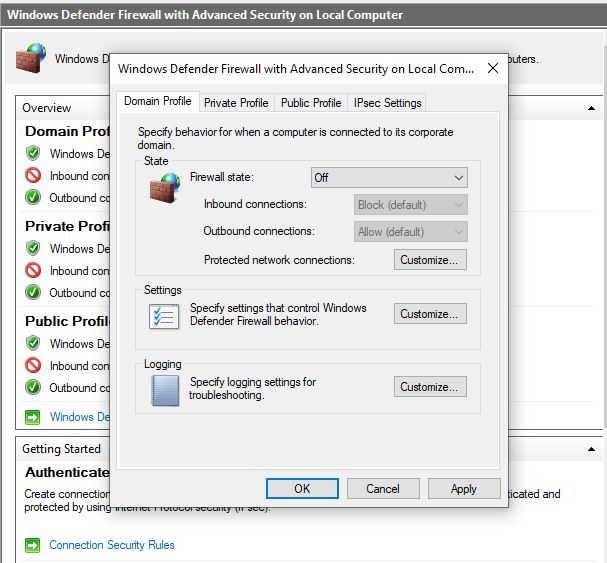
In order to ping it though a few firewall settings will have to be changed first. The Windows Defender Firewall is accessed by typing ‘wf.msc’ in the search bar. In the ‘Windows Defender Firewall Properties’ section the firewall state needs to be turned off for the ‘Domain Profile’, ‘Private Profile’, and the ‘Public Profile’. This isn’t a good practice normally but for the purposes of this exercise they need to be shut off.
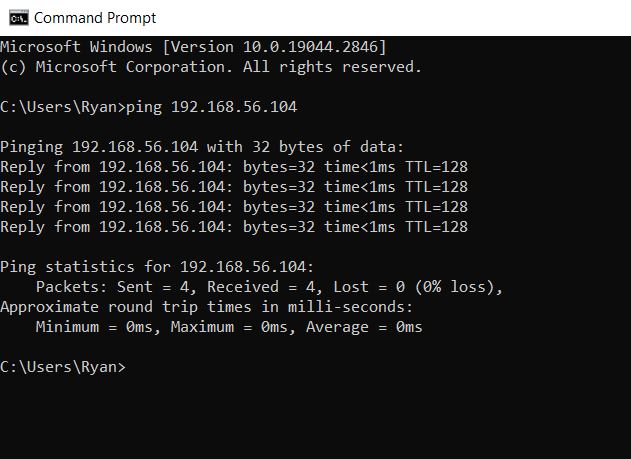
With those settings changed the virtual machine can be pinged from the host computer by using the ‘ping’ command in the command prompt. If the pings do not time out then the change of settings was successful.
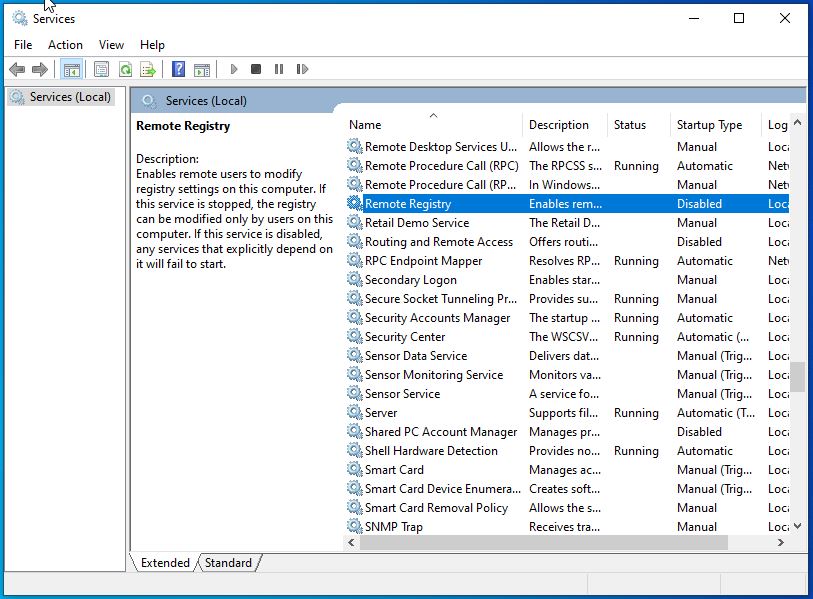
In order to run a ‘Credentialed Scan’ with Nessus on this Windows machine more settings will need to be changed. Tenable offers documentation on what all is necessary so that will be the guide to making the changes. The first step is to go to ‘services.msc’ from the search bar. The Remote Registry needs to be switched to ‘Enabled’ and this will allow Nessus to connect to the registry on the virtual machine.
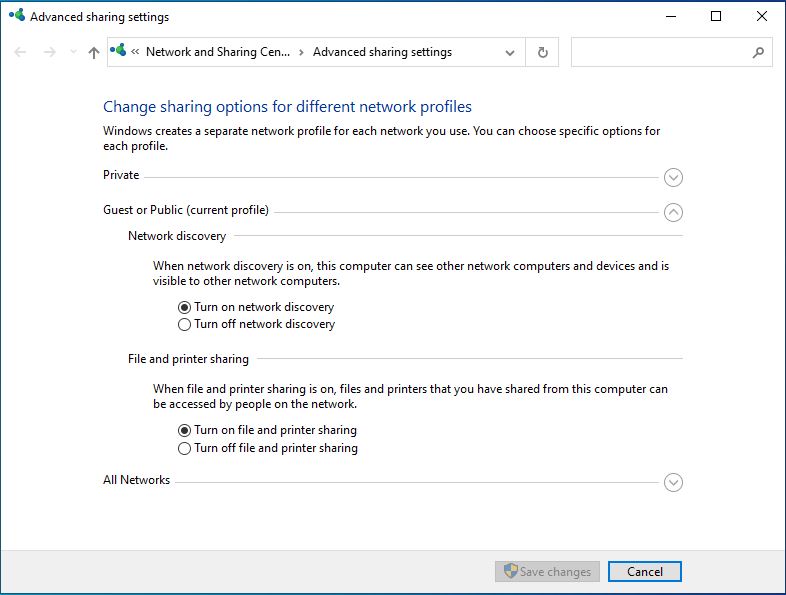
Now ‘File and Printer sharing’ needs to be enabled. This can be done by searching for ‘Advanced Sharing Settings’ in the search bar.
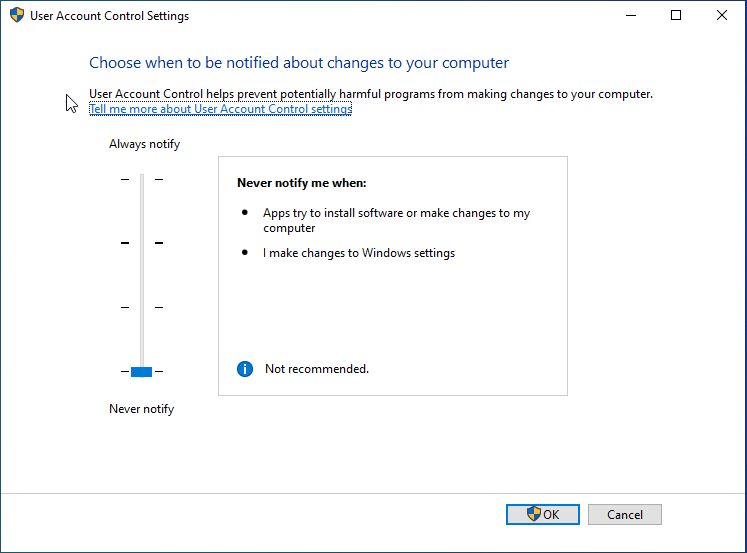
The next step is to go to the ‘User Account Control Settings’ by searching for it in the search bar. The slider bar should be set to ‘Never notify’ and select OK. To reiterate, this is not a good practice in normal settings, but for this exercise it is necessary to complete the vulnerability scan.
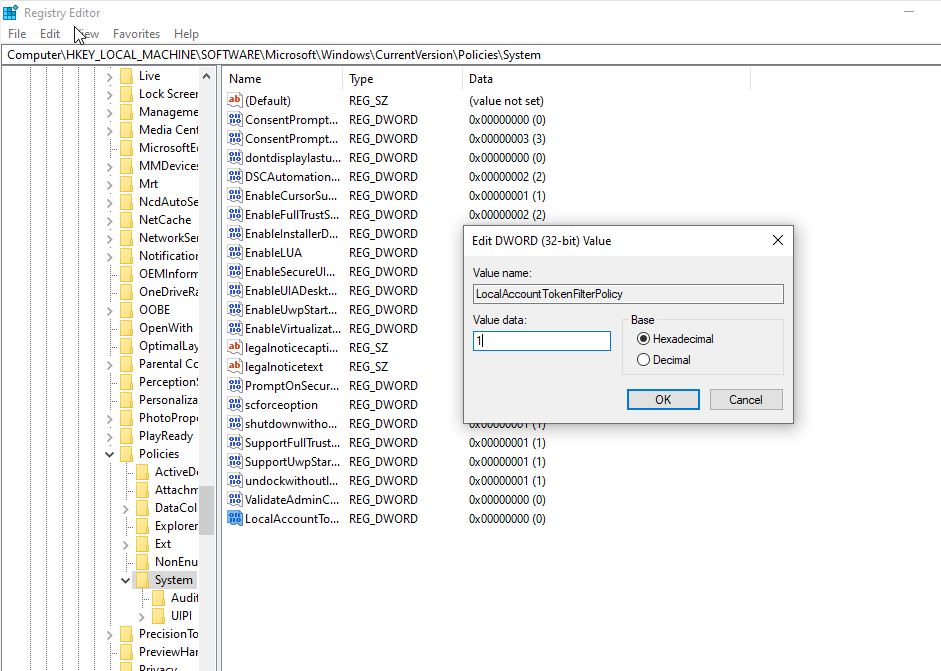
Next up is going to the ‘Registry Editor’ which can also be accessed through the search bar. The Registry file path to follow starts with HKEY_LOCAL_MACHINE -> SOFTWARE -> Microsoft -> Windows -> CurrentVersion -> Policies -> System. From here a new ‘DWORD’ needs to be created called ‘LocalAccountTokenFilterPolicy’. After creating this it can be double clicked and the value field changed to ‘1’.
After all those steps are completed the virtual machine can be restarted and a Credentialed Scan can be configured in Nessus.
In the Nessus dashboard a ‘New Scan’ can be created and from the ‘Vulnerabilities’ section the ‘Basic Network Scan’ option is selected. In the ‘Basic -> General’ section the scan needs a name, a description to describe the purpose of the scan, and a target which will be the IP of the virtual machine.
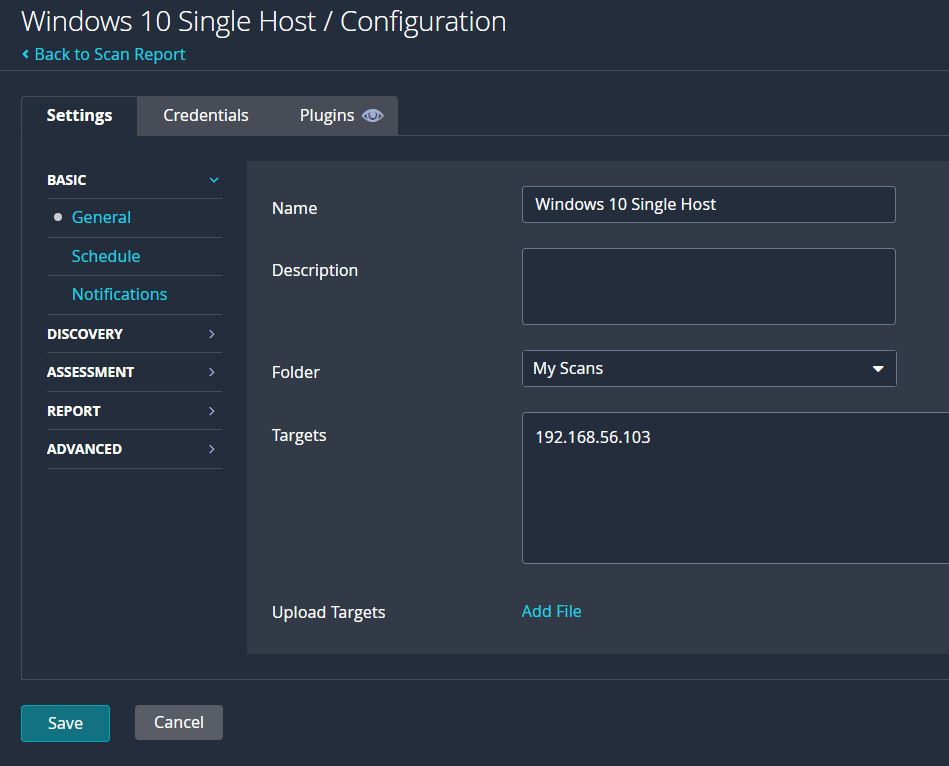
Additional settings like Schedule and Notifications aren’t necessary since the scan is just for this exercise. For the other sections including Discovery, Assessment, Report, and Advanced the default settings will be used for now.
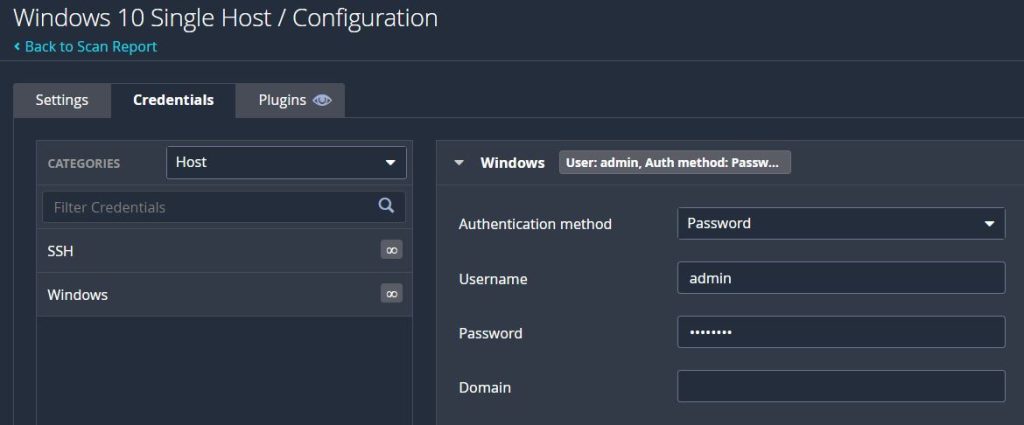
In the Credentials tab the Authentication method can remain as ‘Password’ and the Username and Password fields will be set to the virtual machine’s credentials. This will allow the Nessus scan to return more results since the virtual machine was configured to allow remote scans. Once the scan is saved it can be launched from the ‘My Scans’ folder and it will take several minutes to complete.

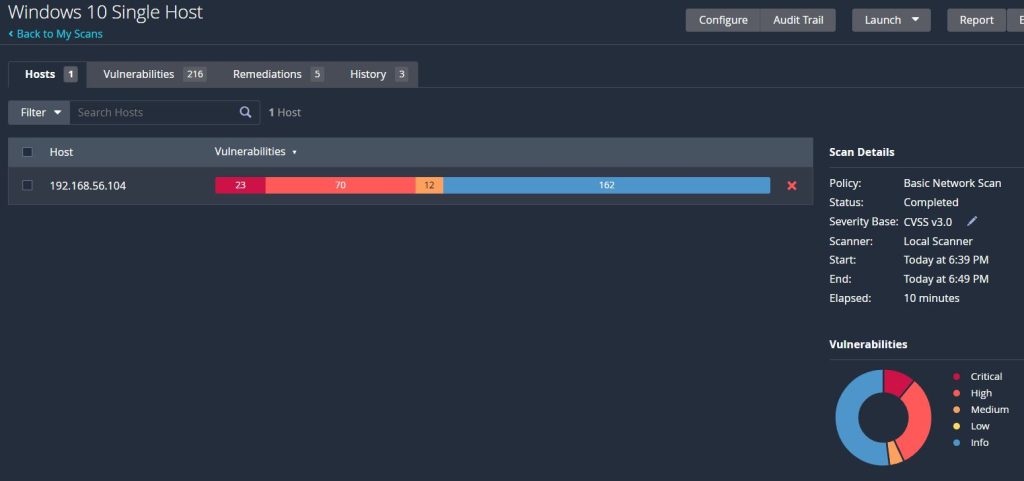
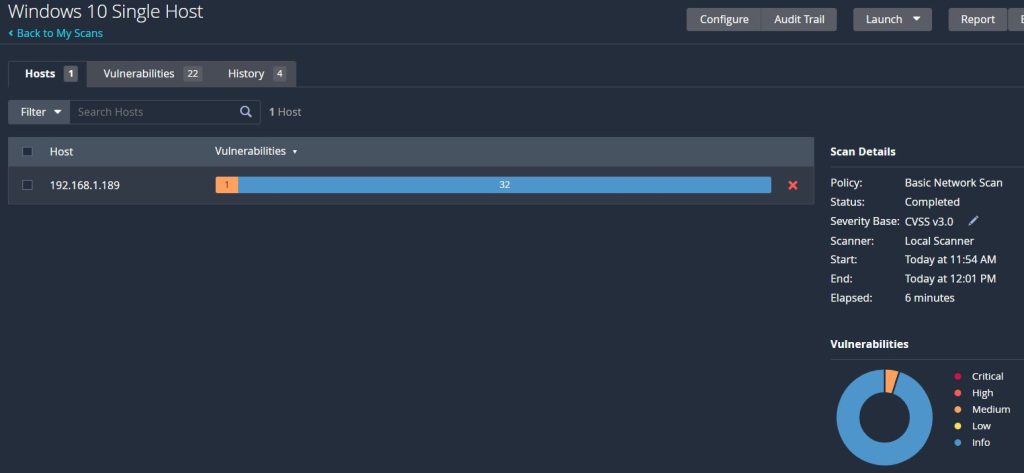
When the scan completes a general overview of the results can be seen on the ‘Hosts’ tab. It will list all of the hosts included in the scan and the number of vulnerabilities discovered for each one. They range in severity from ‘Info’ being the least severe up to ‘Critical’ being the most severe. Critical vulnerabilities are the ones most in need of attention and remediation.
The ‘Vulnerabilities’ tab lists out all of the discovered vulnerabilities, in the default order of highest score to lowest. The score is based on the Common Vulnerability Scoring System (CVSS) which is the open industry standard for assessing the severity of computer system security vulnerabilities and has a range of 0 – 10. The score is an attempt to assign the level of severity each issue has in order to let security personnel prioritize a response according to the potential threat. Tenable also offers a VPR score which is their own scoring system and is more of a companion to rather than replacement for the CVSS.
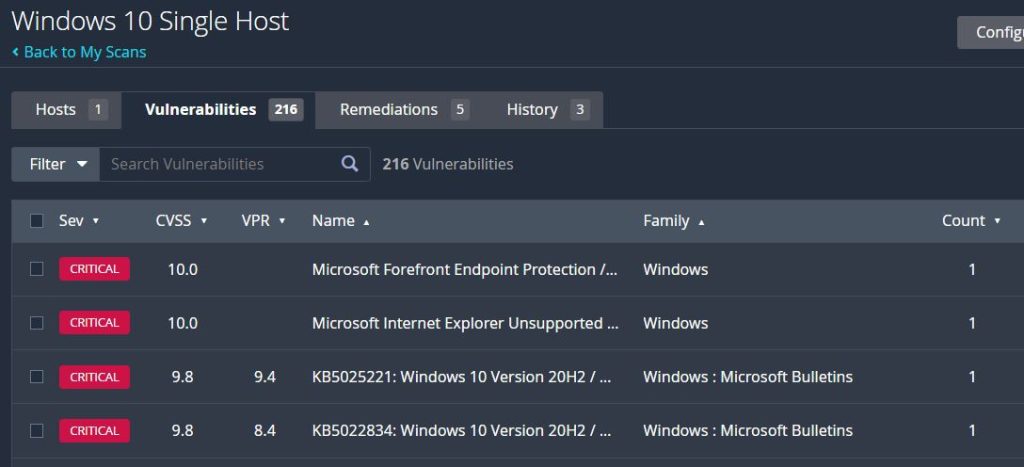
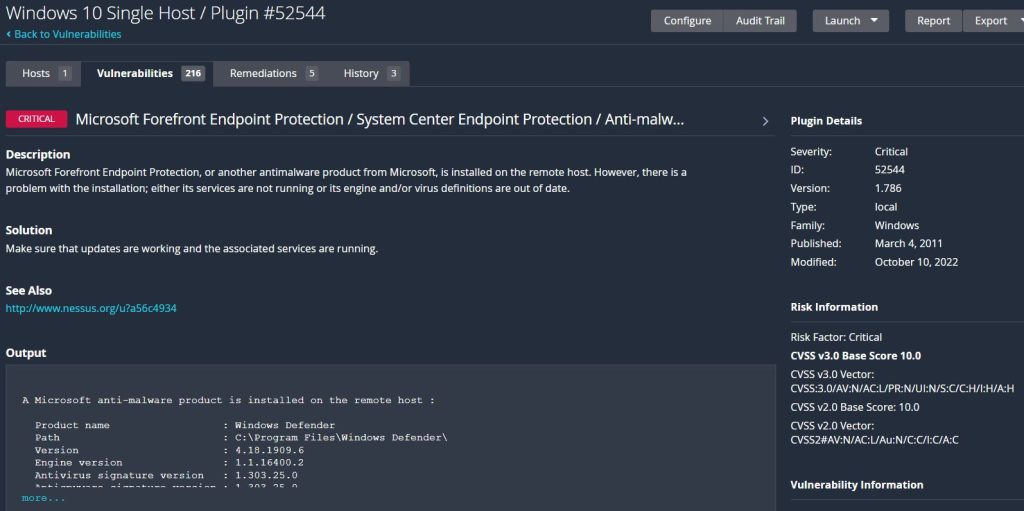
Each item can be opened to read more information about it. It provides a description of the vulnerability, as well as a solution to remediate it and much more information.
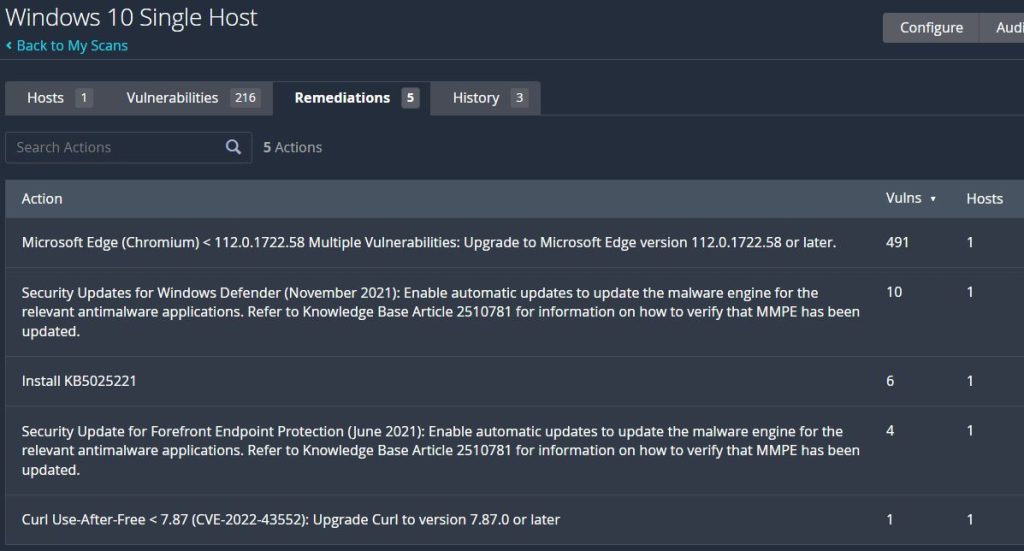
The ‘Remediation’ tab will show actions that can be taken to remediate the discovered vulnerabilities. In this particular scan nearly all of the vulnerabilities are related to Microsoft Edge, and the offered solution is to upgrade it to the latest version. Since this is a fresh install of Windows it’s no surprise that there are several vulnerabilities discovered, and to remediate many of them Windows Update can be run to get it to the latest version.
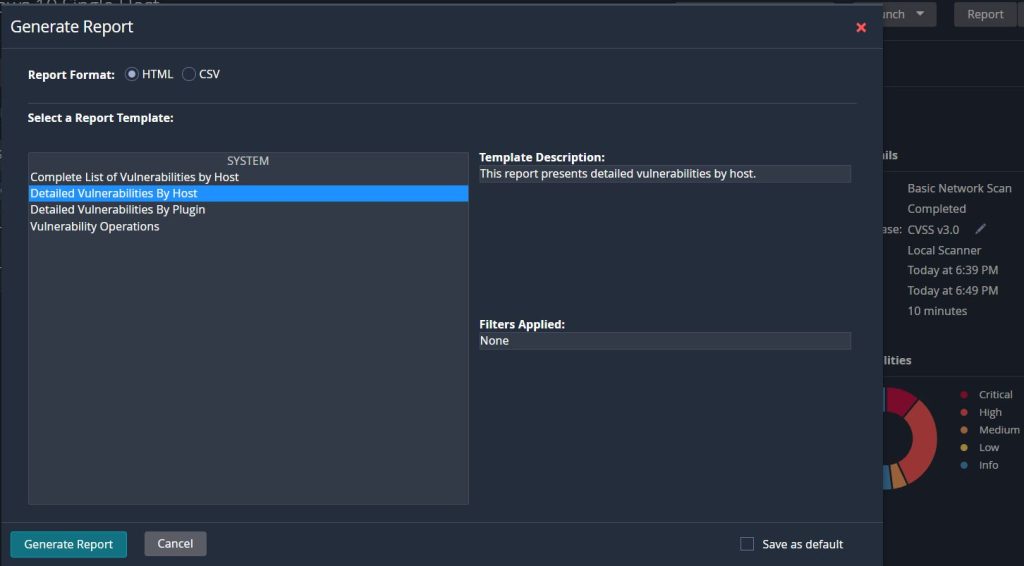
There is also the ‘Report’ section that can be selected which will give the option to run a few different kinds of reports in different formats. This is great for keeping records outside of the Nessus web application on the various scans that are used.
Now Windows Update will download and install the various updates to get Windows 10 updated.
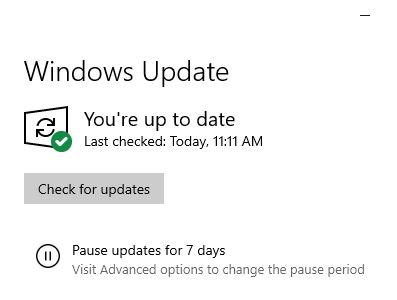
After the updates finish the same Nessus scan be run again. This time the results show that virtually all of the vulnerabilities have been remediated and the virtual machine is now much more secure.
Vulnerability Management for larger organizations will be much more in depth than this example and will take advantage of some of the other options in Nessus such as policies which will allow for more customization in the scan templates.
